
Configure object type mappings
|
Since 4.8
This functionality is available since version 4.8.
|
Mapping is a mechanism that takes input properties from a source, transforms them, and inserts the result into a target property. In other words, mappings are your means of data transformation and exchange among various systems you have connected to midPoint.
Refer to MidPoint Expressions and Mappings for more details on the topic.
Inbound vs. outbound mappings
There are two complementary kinds of mapping rules, inbound and outbound.
Inbound mappings transfer data from projections (e.g., accounts) on the resource side to focal objects (e.g., users) on the midPoint side. They map data in the direction which points into midPoint. For example, you can use inbound mappings to populate midPoint user attributes with data from your remote application, such as an HR system.
Outbound mappings define how to populate the resource-side object attributes with the values from focal object attributes in midPoint. They map data in the direction which points out of midPoint.
In mapping rules of either direction, you need to define:
-
A name which should be descriptive and has to be unique across the whole midPoint resource.
-
A source attribute, the value of which serves as the input for the mapping rule.
-
A target attribute to which the mapping sends its output.
-
An expression declaring how to handle the input value.
-
A lifecycle state.
For inbound mappings, the source is an attribute in the resource and the target is a focus attribute in midPoint. Conversely, for outbound mappings, the source is in midPoint and target is in the resource.
Configure mapping rules
To configure mappings in a midPoint resource:
-
In Resources > All Resources, select your resource.
-
In Accounts, click Configure > Mappings.
Figure 1. Configuration menu in the resource account list as an entry point to the mapping rules wizard
The mapping configuration screen contains two tabs:
-
Inbound mappings (to midPoint)
-
Outbound mappings (to resource)
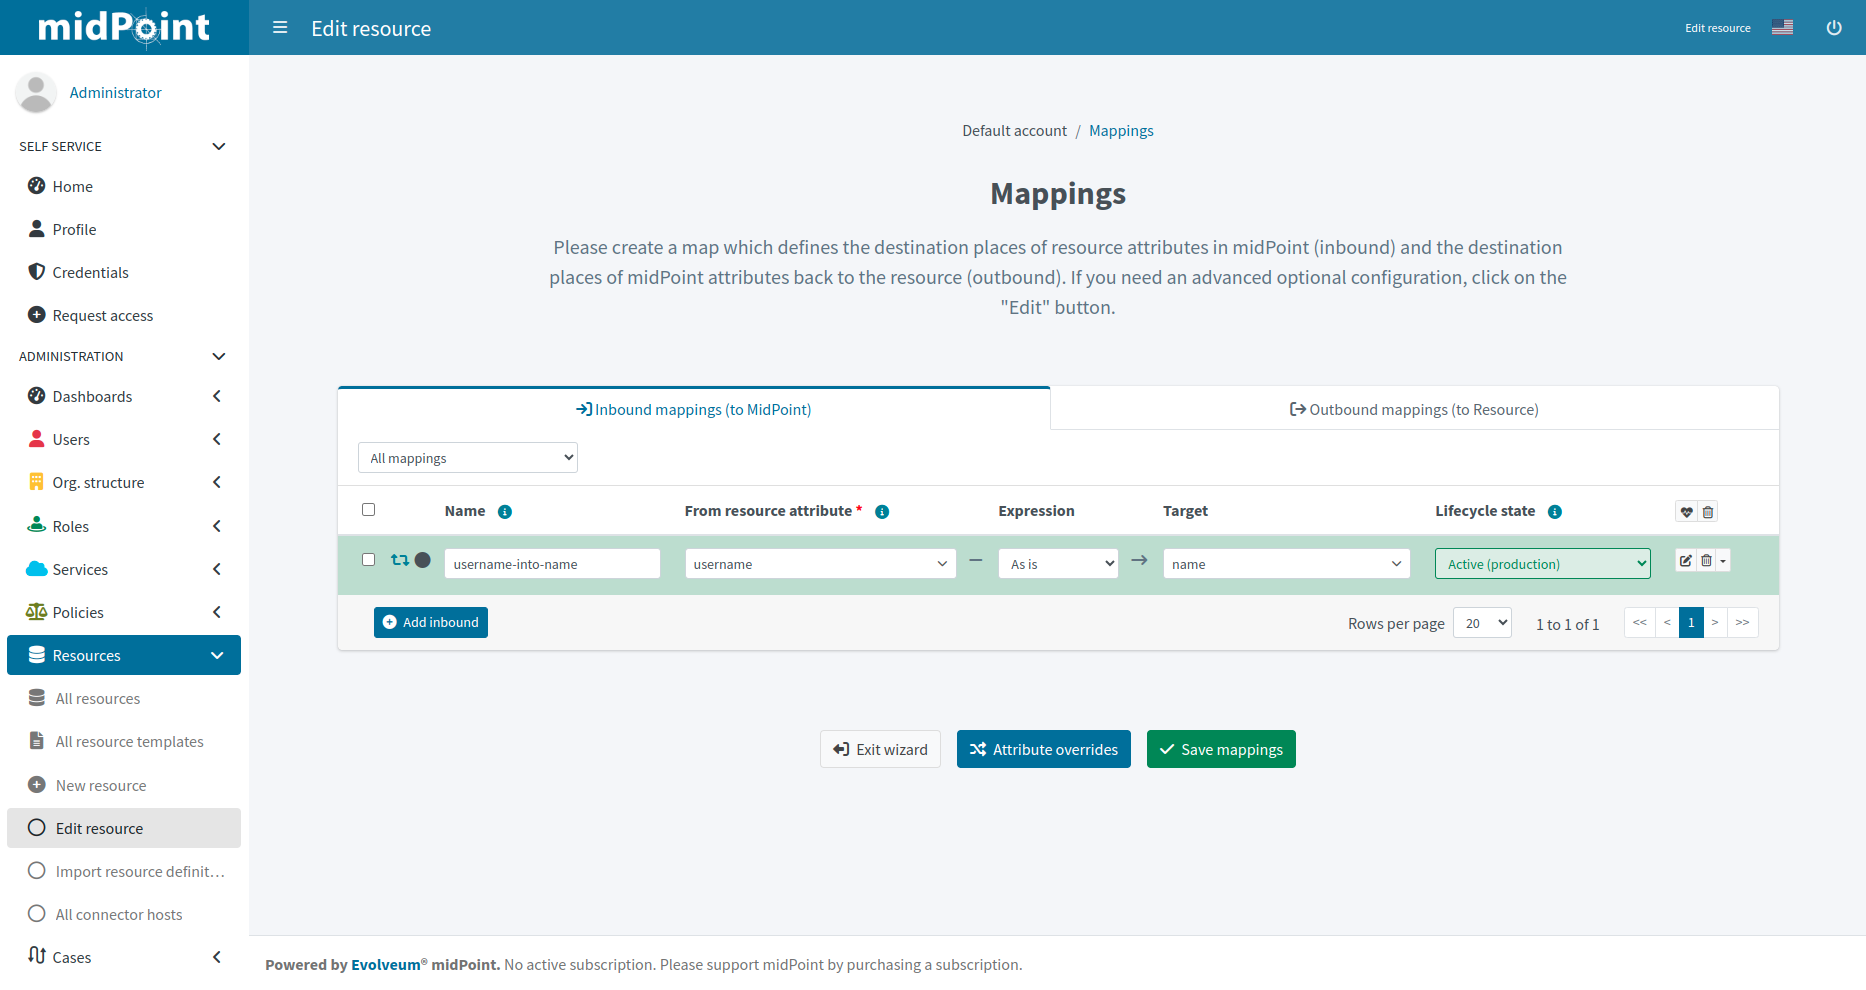
Figure 2. A list of configured inbound mappings
Select a tab according to which direction you need to configure, click Add inbound or Add outbound, and configure the mapping:
-
Name: Name your mapping descriptively. This is convenient during troubleshooting and when using resource template inheritance.
-
From resource attribute (inbound mapping): Select a resource attribute that is used as an input for the mapping.
-
Source (outbound mapping): Select a midPoint focus attribute to be used as an input for the mapping.
-
Expression: Select how to handle the source attribute value. Refer to Expressions for more details.
-
As is (default): Copy values without changes.
-
Literal: Specify one or more constant values upon clicking Show values.
-
Script: Define a more complex behavior using a script upon clicking Show script.
-
Generate: Generate a random string. You can use this to generate passwords. Click Show generate to select the mode:
-
Policy: Generate a password abiding a default or explicitly selected password policy.
-
Universally Unique Identifier: Generate a random unique identifier (UUID).
-
-
Path: Reference a property or a variable upon clicking Show path.
-
-
Target (inbound mapping): Select a midPoint property in which to store the mapping output.
-
To resource attribute (outbound mapping): Select a resource property in which to store the mapping output.
-
Lifecycle state: Select the lifecycle state of the mapping.
Click Save mappings to save your configuration.
|
Use the buttons at the far right of the mapping list rows to delete, rename, or duplicate rules, and to access advanced mapping configuration. |
Attribute overrides
Attribute configuration can be overridden beyond the context of the mappings to give you more maneuvering space, for example to override the default connector behavior. Attribute overrides apply to any use of the overridden attributes; you cannot override an attribute only for outbound mappings, for instance.
Refer to Attribute Definitions and the nested articles for details.
To configure attribute overrides:
-
In Resources > All Resources, select your resource.
-
In Accounts, click Configure > Mappings.
-
Click Attribute overrides
-
To add a new override, click Add override.
|
By default, all attributes that are or have been used in a mapping rule are listed on the attribute overrides screen. |
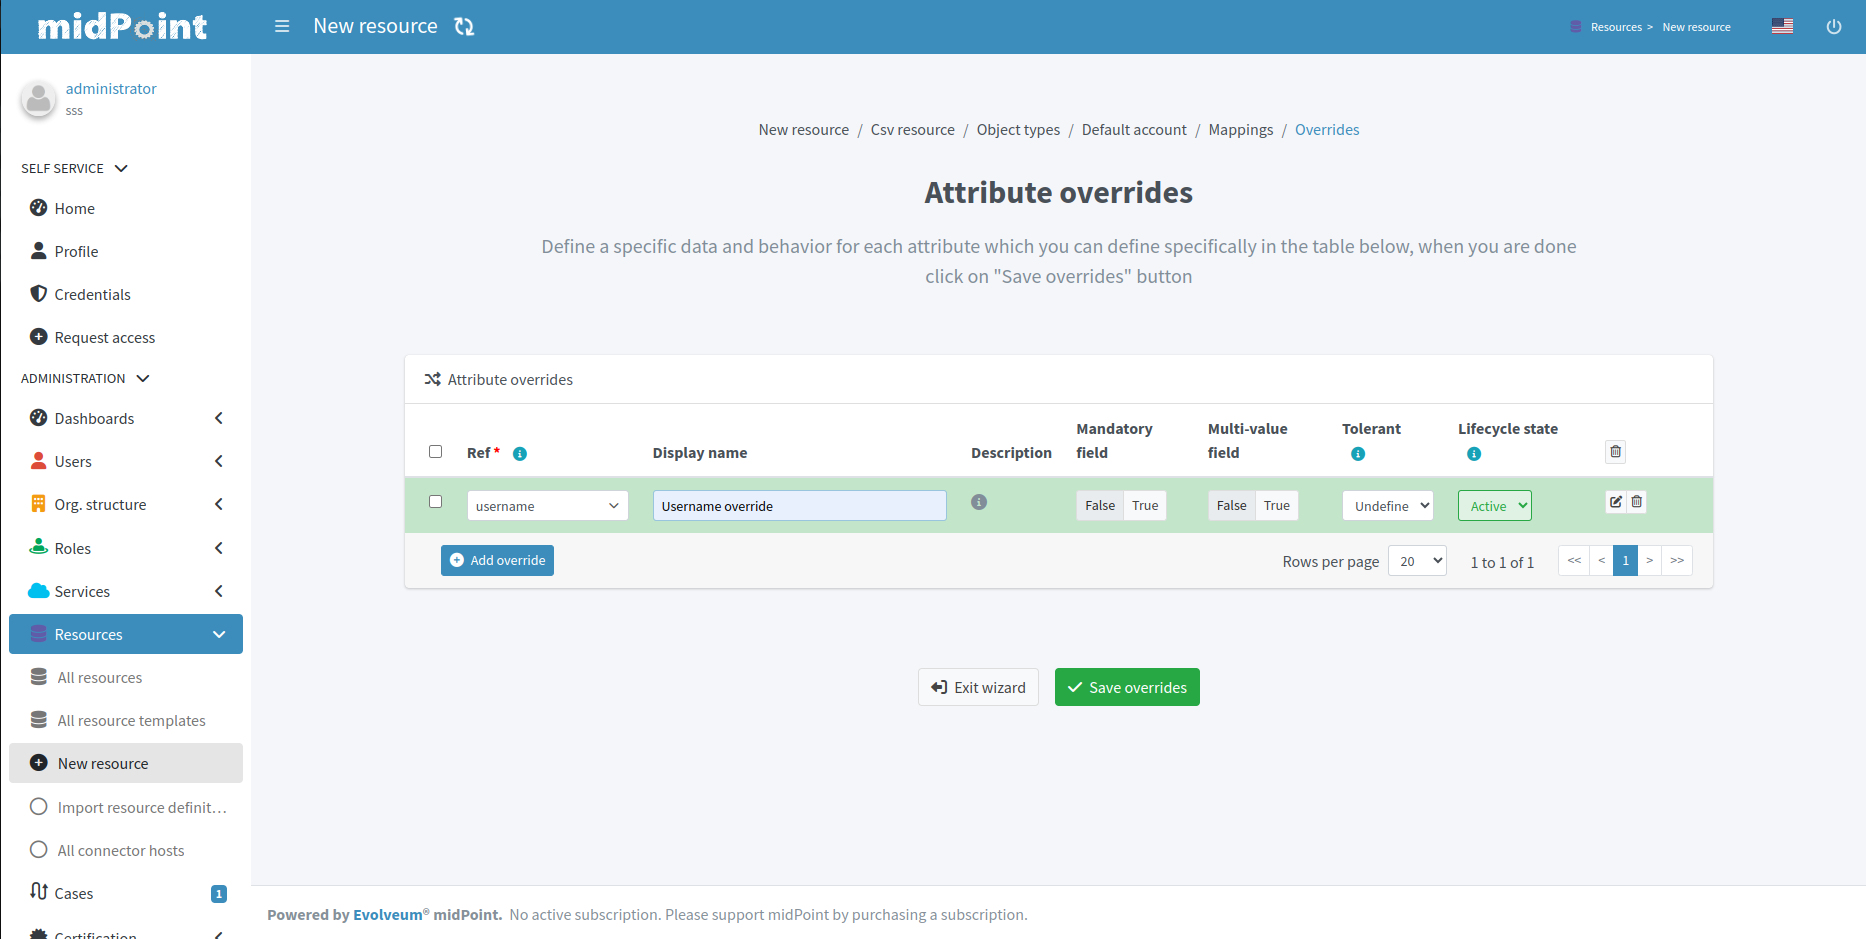
Figure 3. List of configured attribute overrides
These are the options you can configure for an attribute override:
-
Ref: Select the attribute to override.
-
Display name: Specify the display name of the attribute.
-
Description: Define the description of the attribute.
-
Mandatory field: Specify if the attribute is mandatory (True) or not (False).
-
Multi-value field: Define if the attribute can contain multiple values (True) or only a single value (False).
-
Tolerant: Define whether values of a foreign origin are tolerated.
-
When an attribute is tolerant, midPoint will tolerate values it has not provisioned itself, e.g., those set directly in the resource.
-
When an attribute is not tolerant, midPoint will proactively remove during a reconciliation any value that that does not originate from midPoint.
-
-
Lifecycle state: Select the lifecycle state of the attribute.
Click Save overrides to save your changes.
|
Use the buttons at the far right of the attribute override list rows to delete or duplicate overrides, and to access advanced attribute override configuration. |
Limitations
Resource wizard has several limitations, such as:
-
Expression editor supports As is, Script, Literal and Generate expressions only.
-
Mapping ranges are not supported.
-
Mapping domains are not supported.
-
Correlation configuration currently supports the
itemscorrelator only.
MidPoint resource wizard can’t show or edit these features but tolerates them and keeps them untouched if you configure them in XML.
See also
Here are additional resources to explore:
-
Object Lifecycle: Gain a deeper understanding of object lifecycle management in midPoint.
-
Admin GUI Configuration: See configuration options for certain wizard panels and the GUI in general.
Was this page helpful?
YES
NO
Thanks for your feedback