Resource wizard: Wizard for existing resource
|
Since 4.9
This functionality is available since version 4.9.
|
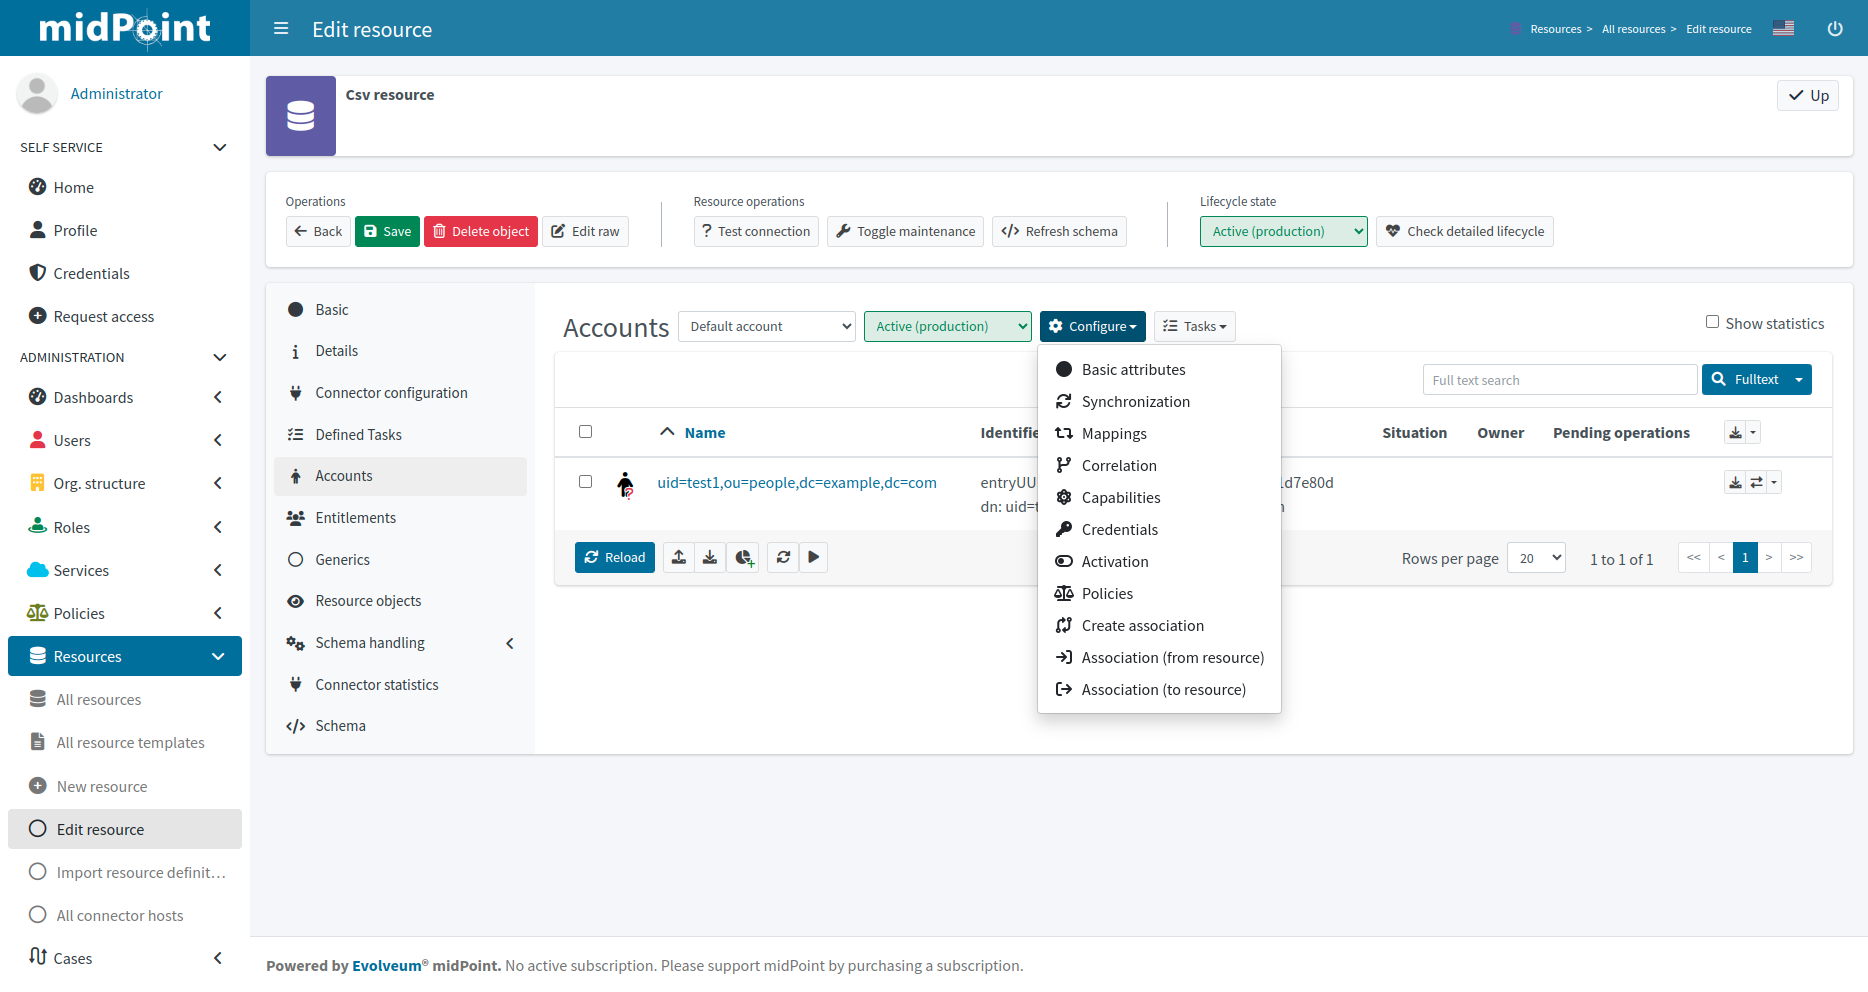
The resource object type wizard can be used also for editing existing resource settings.
Navigate to one of the resource object panels (Accounts, Entitlements or Generic), select the object type by its display name and click btn:[Configure], then select button for particular part of object type wizard.
Figure 1. Resource detail
The existing association configuration can be also accessed from Configure menu, typically for Accounts.

Figure 2. Accessing existing association configuration from accounts
Wizard for task creation
The resource wizard allows creation of resource-related tasks without going to "Server tasks" menu. It allows even more: wizard-like creation of these tasks.
You can create the following types of tasks for your resource objects:
-
Import from resource
-
Reconciliation
-
Live synchronization
All these tasks can be created as standard tasks or simulated tasks.
Standard (non-simulated) tasks
To create a new non-simulated task within the resource wizard, navigate to one of the resource object panels (Accounts, Entitlements or Generics) and click btn:[Tasks], then click Create task.
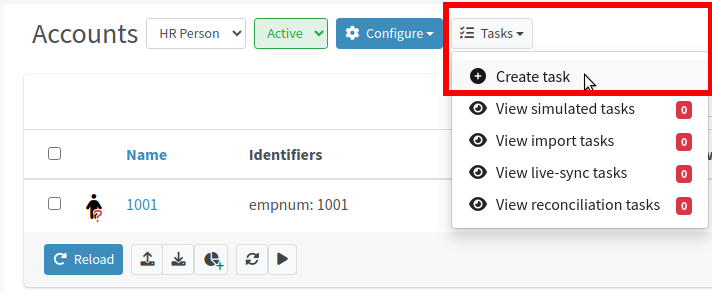
Figure 3. Task creation wizard menu
Keep the Simulate task switch set to OFF.
Select the task to be created (Import, Reconciliation, Live synchronization) by clicking one of the tiles:

Figure 4. Step 1: Select task type
Click btn:[Create task] to start task creation wizard.
Define basic information for the task:
-
Name will be used as the task name. If you do not define the task name, it will be generated automatically based on the task type, resource and object type display name, e.g.
Import task: HR System: HR Person.

Figure 5. Step 2: Enter basic task information
Click btn:[Next: Resource objects] to continue with the task creation.
Define resource-related information for the task. Normally you don’t need to define anything as the task creation wizard will use the information from the resource and object type, where you have started it and Resource, Kind, Intent and/or Object class will be already predefined.

Figure 6. Step 3: Enter resource-related task information
Click btn:[Next: Distribution] to continue with the task creation.
Define distribution information for the task, currently only Worker threads you want to use for the task run. The default value is a single worker.

Figure 7. (Optional) Step 4: Enter distribution details
Click btn:[Save & Run] to save and start task immediately or click btn:[Save settings] to create but not start the task.
You can get to the task details either using menu:Server tasks[All tasks] or clicking Defined tasks menu item in the resource details.
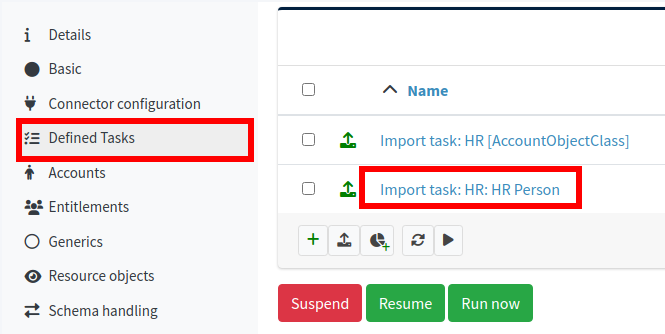
Figure 8. List of tasks defined for the resource
Simulated tasks
To create a new simulated task within the resource wizard, navigate to one of the resource object panels (Accounts, Entitlements or Generics) and click btn:[Tasks], then click Create task.
Figure 9. Task creation wizard menu
Switch the Simulate task to ON.
Select the task to be created (Import, Reconciliation, Live synchronization) by clicking one of the tiles:

Figure 10. Step 1: Select task type (with simulation)j
Click btn:[Create task] to start task creation wizard.
Define basic information for the task:
-
Name will be used as the task name. If you do not define the task name, it will be generated automatically based on the task type, resource and object type display name, e.g.
Import task: HR System: HR Person. In the following image we are using a custom task nameReconciliation with AD - development simulation.

Figure 11. Step 2: Enter basic task information
Click btn:[Next: Resource objects] to continue with the task creation.
Define resource-related information for the task. Normally you don’t need to define anything as the task creation wizard will use the information from the resource and object type, where you have started it and Resource, Kind, Intent and/or Object class will be already predefined.

Figure 12. Step 3: Enter resource-related task information
Click btn:[Next: Execution] to continue with the task creation. The "Execution" parameters can be edited only for simulated tasks.
Define execution-related information for the task. This allows to configure the task simulation parameters:
Execution
-
Mode allows to specify either
FullorPreviewexecution modes. For simulation, selectPreview(which is automatically set as default when creating a simulated task)
Configuration to use
-
Predefined allows to specify the configuration that will be used for the simulation.
-
Development allows evaluating all configuration which is in lifecycle state
ActiveorProposed -
Production allows evaluating all configuration which is in lifecycle state
ActiveorDeprecated
-

Figure 13. Step 4: Enter execution-related task information
Click btn:[Next: Schedule] to continue with the task creation. The "Schedule" parameters can be edited only for reconciliation and/or live synchronization tasks.
Define scheduling-related information for the task.
| Scheduling usually does not make much sense when creating a simulated task. |
-
Interval allows defining scheduling interval in seconds
-
Cron-like pattern allows defining scheduling intervals via cron-like pattern

Figure 14. (Optional) Step 5: Enter scheduling-related task information
Click btn:[Next: Distribution] to continue with the task creation.
Define distribution information for the task, currently only Worker threads you want to use for the task run. The default value is a single worker.
Figure 15. (Optional) Step 6: Enter distribution details
Click btn:[Save & Run] to save and start task immediately or click btn:[Save settings] to create but not start the task.
You can get to the task details either using menu:Server tasks[All tasks] or clicking Defined tasks menu item in the resource details.
Figure 16. List of tasks defined for the resource
Configuration of Resource Wizard Panels
Some wizard panels are configurable. See Wizard panels for more information.
Was this page helpful?
YES
NO
Thanks for your feedback